I haven't been posting anything lately because we've been so busy that I haven't had a chance to cook anything new or cool. I have relied heavily on frozen vegetables and Chicken Kiev...not post-worthy. But, luckily for my struggling blog, I did try a new pie for my mother-in-law this Thanksgiving! I also made chicken and noodles for the first time, so I will post about that one later.
A few weeks ago, Janie told me about a pie that she used to love when she was a little girl that had cream cheese, sour cream, and blueberry pie filling on a graham cracker crust. She said that she used to request it on her birthday and other special days and it was just SO good. I thought it sounded gross, because I have an issue with cream cheese, but I went home and looked up a recipe based on those ingredients figuring that even if I thought about half of the ingredients were disgusting that I could still make it for her. What I found was a recipe for "Cherry Cheese Pie." You can use either cherries or blueberries with it, and Janie said that the pie I took to Thanksgiving reminded her also of Cherry Delight, so I've renamed the recipe. I'm sure you can see why - Cherry Cheese Pie sounds disgusting :) She really liked it, and said that although she hadn't eaten it in years and years, she thinks it was exactly what her mom used to make. So that was worth my squickiness about the ingredients. Anyway, here it is.
BLUEBERRY DELIGHT
2 8oz packages cream cheese (softened)
1/2 C sugar, plus 2 T for later
2 eggs
1/4 t almond extract
1/2 C sour cream
1/2 t vanilla extract
1 21 oz can blueberry (or cherry) pie filling
1 8-inch graham cracker pie crust
Preheat oven to 325. Combine cream cheese, 1/2 C sugar, eggs, and almond extract in a medium-sized mixing bowl. Beat with an electric mixer on medium/high speed until smooth and fluffy.
Pour mixture into pie crust.* Bake at 325 for 35 minutes or until set.**
Mix sour cream, 2 T sugar, and vanilla in a small bowl. Spread over pie. Bake for 5 more minutes at 325.
Cool pie to room temperature, then refrigerate until ready to serve.
Spoon pie filling over individual pieces prior to serving.
* It looks like you're going to overflow the pie crust, but this is okay. You won't. When I tried this recipe , I still wasn't entirely clear on when the fruit was added, and as a result was freaked out that it wasn't going to work and I would have to start over, etc...luckily, everything turned out okay.
** I had to bake it for about 40 minutes to set, and my oven runs hot. I checked to see if it was 'set' by seeing if it still jiggled in the middle when I wiggled the pie pan. Jiggly in the middle is bad.
Friday, November 24, 2006
Sunday, November 12, 2006
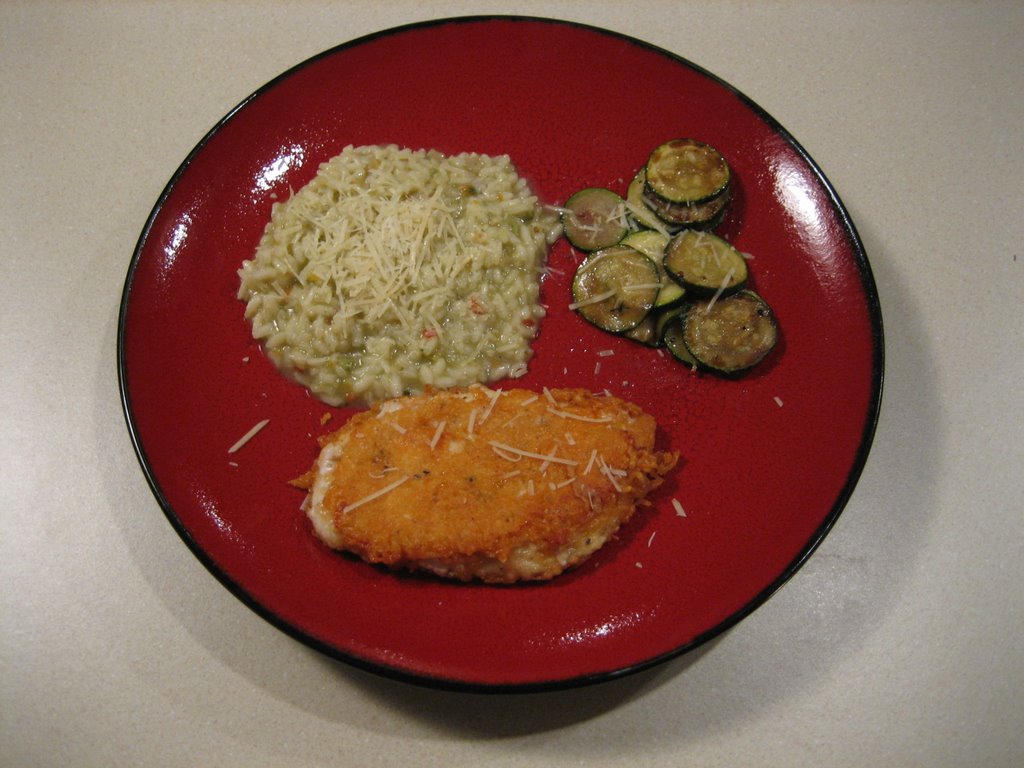
Parmesan-Crusted Chicken - Or, Rachael Ray is a Liar
This recipe is, indeed, from Rachael Ray. And I think that she is probably a very honest person in general, but if you make this recipe as directed you will end up burning down your kitchen. As did I the first time I attempted the parm-crustedness. I made this tonight for the 4th time and it finally turned out exactly how Rachael said it is supposed to, all goldeny-gooey-crusty-crispy on the outside and tender on the inside. So don't be discouraged if your first try or so isn't that stellar...practice makes perfect :) I will share some of my parmesan-crusted chicken warrior tips with you, though, so that maybe you can avoid some of my tragic mistakes!!
PARMESAN-CRUSTED CHICKEN with TOMATO-BASIL GARNISH*
From Rachael Ray, modified by Kira
Serves 4
4 (6-8 oz) boneless skinnless chicken breasts
2 C shredded (not grated) parmesan
4-5+ T olive oil**
4 plum Roma tomatoes, seeded and chopped
15-20 fresh basil leaves, rolled and thinly sliced (chiffonade)
Coarse ground pepper to taste
A teeny pinch of salt for the garnish (optional)
Roll out a 1-2 foot piece of waxed paper or aluminum foil near the stove top. Add 4+ T (about 4 turns of the pan) of olive oil to a nonstick skillet*** and begin to heat the skillet - it must be very hot when the chicken is added.
Pile the shredded parmesan **** on the work surface you created with the waxed paper or aluminum foil. Season the chicken breasts with black pepper but no salt - the parmesan cheese adds enough salt to the taste of the dish.
Press the chicken breasts firmly into the cheese, coating both sides of the breasts with as much cheese as possible. Set breasts into the skillet and cook 7 minutes on each side, until cheese forms an even, golden casing around the tender chicken breasts.
While the chicken cooks, combine chopped tomatoes with basil in a small bowl. Add a splash of olive oil to the mixture and combine with your fingers for maximum flavor release from the tomatoes. Season to taste with pepper and salt.
Drain any excess oil from chicken as you remove it from the skilled. Top chicken with big spoonfuls of raw sauce.
* Ryan doesn't like the garnish so that's why it is mysteriously missing from the picture that I took of tonight's dinner. I like the garnish quite a bit, but I was too lazy to whip it up for just me. In case you are curious, the other stuff is garlic risotto (from a box, but I did use 1/2 chicken stock and 1/2 water) and sauteed zucchini.
** Rachael says that you only need ONE tablespoon of olive oil for the chicken. THIS IS A LIE. You will need about 4 turns of the pan.
*** Interestingly, she also tells you to heat the nonstick pan "very hot" prior to adding the oil. There are a few problems with this. First, I have heard from several reliable sources that if nonstick pans are going to release toxins, they do it when they are heated with nothing in them. Secondly, if you put cold oil into a hot pan, it tends to SMOKE. A lot. Trust me on the smoke thing.
**** You will probably have some leftover parmesan. While I don't recommend eating it straight up, since it's covered in raw chicken, you can drop little globs of it into the oil while the chicken cooks. They will cook into delightful little parmesan crispies that you can then snack on while you wait :) Or put on a salad or something...if you don't eat them all first!
Thursday, November 09, 2006
Buttery Garlic Chicken - Or, Baked Chicken Ryan Likes
I did a midstream dinner switch tonight.
I was going to make Parmesan-Crusted Chicken (a Rachael Ray special) but then I realized that I didn't have any roma tomatoes and basil for the garnish and I didn't want to eat it on spaghetti with icky Ragu since I also was too lazy to make my own marinara - so instead, I fell back to what has very recently (since I have only made it 3 times) become a quick and easy dinner standby: Buttery Garlic Chicken.
This dish is perfect because it combines 3 things that I absolutely ADORE. Mostly butter, then garlic, and then of course chicken. If I had to rank them. And, of course, three things that I have on hand. The first time I made this I didn't tell Ryan that you have to broil the chicken, because he has this issue with chicken that comes from the oven. I figured that if he didn't know that was how I cooked it that he would try it, like it, and then he could finally check his baked chicken baggage. But he found out...luckily he took a bite anyway and just as I had hoped, fell in love.
Oh and by the way, in case the title didn't clue you in - this is NOT healthy. You may have noticed a buttery theme running through this cooking blog. I don't make EVERYTHING with butter, but it probably seems that way! I am, of course, a disciple of Paula Deen. :)
BUTTERY GARLIC CHICKEN
from The Best of Everyday Cooking, tweaked by Kira
Serves 4
4 boneless skinless chicken breasts
1/2 C butter, softened but not melted
3 cloves garlic, minced *
1 teaspoon dried parsley **
1/4 teaspoon dried rosemary
1/4 teaspoon dried thyme
VARIATION: Omit sage and butter and use 1/4 C lime juice for a "refreshing citrusy taste."
Preheat broiler. Trim fat from chicken. If chicken breasts are whole, split them to make them thinner. Line a broiler pan with foil. Place chicken in the prepared pan.
Combine butter, garlic, and dried herbs; mix well. ***
Place 2-3 small dollops of herb butter on each chicken breast.
Broil chicken ****, turning and smallish-dolloping frequently with with remaining butter herb mixture, until juices run clear when thickest portion of meat is pierced with a knife, about 15 minutes. *****
* I'm not sure why they say "minced" here. Everyone (even me, the dangerously inexperienced cook) knows that garlic butter is best when the garlic is run through the garlic press...maybe the technical term for that IS minced, but I prefer "smooshed."
** To be honest, I have never made this recipe as directed. The first time I made it I veered from the recipe because I realized in medias res that I didn't have any of the dried herbs that it called for - oops. I was forced to substitute, so I closed my eyes, thrust my hand into my spice cabinet, and came out with a bottle of dried garlic, basil and sundried tomato pesto mix. Let's just say that works VERY well. So really, any dried herbs that you like will be delish.
*** This is my FAVORITE part, surprise surprise. I eat this mixture prior to putting it on the chicken by slathering it onto tiny wedges of fresh parmesan. Which gives me wicked garlic breath. But it is SO SO good!!! Usually I make too much (oops!) so that I can have some extra butter to, um, snack on later. Yes, I am going to die of a heart attack when I am 35.
**** Interestingly, the recipe does not remind you that when you broil things, you should always do so with the oven door ajar. You know, ajar to where it stays open, about 6 inches. I learned that THIS WEEK. From a Wikipedia entry on broiling. Aack. The first time I made this I didn't know about the whole oven door ajar thing and nothing bad happened, but the second time...let's just say my kitchen smelled like torched butter for about a week and I was exhibiting symptoms of smoke inhalation. When I made this tonight I left the oven door ajar and they were perfect, no smoke. Also, in my ancient windowless oven, that makes it easier to see them - you can watch the butter melt. And as a special bonus you can see and hear the fireworks that ensue when the splatters of butter hit the heating element. Like PopRocks!
***** The 15 minutes is total time, not broiling time. So you don't need to stop the timer every time you take them out to turn them. Especially if the breasts are on the thinner side...they might get pretty parched in there for the whole 15. Just check them before you eat them - I don't want to be responsible for you getting poisoned! :)
Monday, November 06, 2006
Mashed Potatoes to Impress...
I love mashed potatoes. Who doesn't? I made this Mashed Potato, Cheese, and Chive Gratin tonight as a "test drive" for Thanksgiving. It's not the brightest idea to have Thanksgiving (or another holiday) be your first try at a recipe - especially when you are cooking for your husband's persnickety extended family.
This recipe is from Epicurious.com, and was sent to me by my foodie friend Amber. She made these last year for a holiday and said they were fantastic. After making them myself, I am a believer! Ryan said - "These are the best homemade mashed potatoes I have ever had." And he is somewhat persnickety. So...whip these up on a chilly winter night. Mmmmmmm :)
MASHED POTATO, CHEESE, AND CHIVE GRATIN
From Epicurious.com, tweaked by Kira
3 1/2 pounds russet potatoes, peeled, cut into 1-inch cubes
1 8oz package cream cheese, room temperature *
1/2 sour cream
1/2 cup whole milk
3/4 cup chopped fresh chives (about 3 bunches) **
1 tablespoon chilled butter, cut into small pieces
Grated parmigiano-reggiano or parmesan cheese ***
Salt and Pepper to taste
Butter 6 to 8 cup ovenproof dish. Cook potatoes in a large pot of boiling salted water until
tender, about 12 minutes. Drain potatoes; return to same pot. Add cream cheese and mash well. Mix in sour cream and milk, then chives. Season with salt and pepper. Spoon potatoes into prepared dish and dot with chilled butter (Can be made 2 hours ahead; let stand at room temperature).
Preheat oven to 375. Bake potatoes until heated through and beginning to brown on top, about 30 minutes.
* If you are halving this as I did for tonight, Philly Cream Cheese makes these darling little 3oz packages that are just perfect! I used one of those and then tossed in a few tablespoons of butter to make up the rest. I have to admit to a weakness for butter in my mashed potatoes.
** I used scallions because the ghetto grocery store next to the Y did not have (!!) fresh chives. The scallions were great, though, and contributed toward these tasting somewhat like sour cream & onion potato chips. That's a good thing!
*** I added some freshly grated parmigiano-reggiano cheese both to the mixture (add it after the chives) and then to the top after the potatoes were in the baking dish. The parm-reg has a really fantastic nutty flavor that complimented my "chives" nicely.
Thursday, November 02, 2006
Pumpkin Chocolate Chip Squares - Or, I Need a Shopping List
Another pumpkin recipe? Yes. Because it is Fall and it's COLD and pumpkin is oh-so-seasonal. Plus, this recipe is fantastic! Thanks to Lisa for the link :)
I knew that I would have to make a trip to the grocery store before making the pumpkin chocolate chip squares as I was missing (1) unsalted butter because let's face it, the unsalted kind doesn't taste good straight-up, (2) pumpkin pie spice and (3) chocolate chips. So I managed, through a massive effort, to drag my butt off of the couch and head to Wal-Mart after I ate a delicious dinner of cold pizza from Tuesday night. It really was delicious, I love cold pizza.
Anyway, I got to Wal-Mart and immediately grabbed the pumpkin pie spice, chocolate chips, and an extra can of pumpkin just in case what I had left over from the muffins wasn't enough (it was). I then went to wait in what had suddenly become extremely long lines for the "20 Items or Less" lanes.
After getting to the register, I looked at my 3 items and realized that I had forgotten the butter. I was paralyzed for a moment and couldn't decide whether I should just buy the stuff I had and use salted butter (gasp!) or just go to another store and get the butter because well, it's kind of embarrassing to get all the way to the front of the line and then have to jump out. Indecision indecision indecison indecision "Um, can I please leave these with you for a minute? And come back to your line? I forgot something." The cashier was terribly confused but he said "Okay" and I ran to the dairy section. Of course when I came back the line was a lot longer but I waited patiently and read the butter package. Which was semi-educational, actually. I learned that 1 tablespoon of butter has 100 calories. Holy sh*t.
At last I left Wal-Mart and came home. I started the prep part of the recipe, which includes lining a pan with foil. I got all the way up to the vanilla and realized that I didn't actually have any. I searched my cupboards anyway just to make sure, but the only thing I found was peppermint extract. Which would NOT have been an appropriate substitute. I was so ticked at myself. Why didn't I do an inventory BEFORE I went to the store? And then write a list? Ha. I don't need lists. Oh wait...
Ryan went out and got the vanilla for me. He's the best. I guess he figured it was the least he could do since he'll be eating probably 9/10ths of these squares tonight and tomorrow :)
PUMPKIN CHOCOLATE-CHIP SQUARES
Makes 24
From Martha Stewart by way of Lisa
2 C all-purpose flour (spooned and leveled)
1 T pumpkin pie spice
1 t baking soda
3/4 t salt
1 C (2 sticks!) unsalted butter, room temperature
1 1/4 C sugar
1 large egg
2 t vanilla extract *
1 C canned pumpkin puree
1 12 oz package semisweet chocolate chips
1. Preheat oven to 350. Line bottom and sides of a 9x13 baking pan with foil, leaving an overhang on all sides. ** In a medium bowl, whisk together flour, pie spice, baking soda, and salt; set aside.
2. With an electric mixer ***, cream butter and sugar on medium-high speed until smooth; beat in egg and vanilla until combined. Beat in pumpkin puree (mixture may appear curdled). Reduce speed to low, and mix in dry ingredients until just combined. Fold in chocolate chips.
3. Spread batter evenly in prepared pan. Bake until edges begin to pull away from sides of pan and a toothpick inserted in center comes out with just a few moist crumbs attached, 35-40 mins. Cool completely in pan.
4. Lift cake from pan (using foil as an aid). Peel off foil, and use a serrated knife to cut into 24 squares.
* 2 teaspoons vanilla is too much for me in this recipe. Next time I'm going to cut it way down or maybe even not use any. However, if you like vanilla, you'll want the whole amount.
** If you have it, use heavy-duty aluminum foil. It's a lot wider and basically indestructible.
*** This recipe isn't kidding about the electric mixer. You will NEED it.
Wednesday, November 01, 2006
Raw-Fried Potatoes
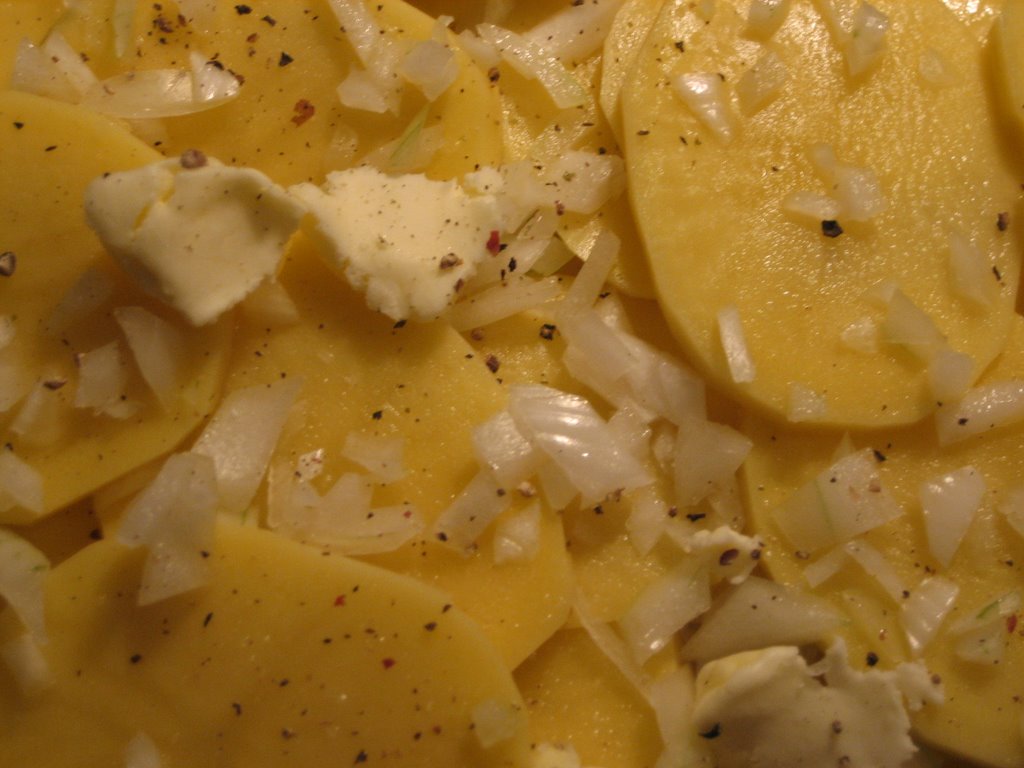
Yes, that is indeed a gigantic glob of butter that you see! Tonight's illustration is of the raw-fried potatoes BEFORE they were fried. If I figure out how to post 2 pictures I will add the one I took after...and you won't even be able to tell much difference, except for some (oops) scorch marks on the potatoes. Hence, "raw-fried."
I made raw-fried potatoes tonight because (1) they are easy (2) they go well with storebought rotisserie chicken and (3) I had Yukon Gold potatoes and I don't like to straight-up bake those. I kind of burned them, and I think I did something wrong with the onions, and ALSO I realized near the end when the potatoes weren't quite tender enough that I was probably supposed to be covering them and...these work a ton better in a very heavy skillet. Which I do not have. No, I did not register for Le Cruset. Mistake? Sigh.
My mom made these when I was a kid and I did not call her to ask for the recipe, because these truly are very easy - I just went along with what I remembered from when I used to cook these at home, in my mom's Le Cruset. Probably with the lid on. So, forgive me if the recipe is a little (okay totally) approximated. But...when you consider that I (1) didn't have an actual recipe, (2) didn't have the right kind of pan, (3) didn't use a lid last time I made these OR most of this time and (4) chopped up the onions like a Wusthof-wielding preschooler... Well, guess what? They still tasted pretty darned good. I was shocked. So, knowing that, you may be tempted to go for it.
Raw Fried Potaotes
Serves ?
From Kira's head...yikes.
Potatoes *
1/2 a sweet yellow onion, chopped or diced or just no longer whole. The potato to onion ratio should be about 4 potatoes to 1/2 an onion
Salt to taste
Pepper to taste
Other Spices to taste **
3 T stick butter, solid and cut into small squares ***
Slice potatoes somewhere in between slab and potato chip thickness. Cover bottom of a preferably heavy skillet with a layer of potatoes. Toss some onions over the potatoes. Drop a few squares of butter into the mix. Toss in a little salt, pepper, and Other Spices to taste. Repeat until you're out of potatoes, onions, and butter (but NOT salt, pepper, or Other Spices!). Cover and cook on medium to medium-high heat for about 10 minutes. Remove cover and flip potatoes. At this point, if you feel the need to add more butter, do so without guilt. Cover and cook for another 10ish minutes, or until the potatoes are tender. Scorched bottoms optional!
* Good potato choices: typical Idaho bakers or, if you're feeling sassy, Yukon Gold
** Oregano is good for a little dash of "hmmmm...what is that?"
*** I prefer to pinch mine off because then I can lick butter off of my fingers - only if there aren't guests eating, of course
Yum........even if you cook them uncovered in a nonstick skillet and burn the bottoms. Recipe forgiveness is a beautiful thing!
Subscribe to:
Comments (Atom)